iodine-0.8.0 % make
		OS is DARWIN, arch is arm64
		CC tun.c
		CC dns.c
		CC read.c
		CC encoding.c
		CC login.c
		CC base32.c
		CC base64.c
		Making base64u.c
		CC common.c
		common.c:283:2: warning: 'daemon' is deprecated: first deprecated in macOS 10.5 - Use posix_spawn APIs instead. [-Wdeprecated-declarations]
		        daemon(0, 0);
		        ^
		/Library/Developer/CommandLineTools/SDKs/MacOSX.sdk/usr/include/stdlib.h:294:6: note: 'daemon' has been explicitly marked deprecated here
		int      daemon(int, int) __DARWIN_1050(daemon) __OSX_AVAILABLE_BUT_DEPRECATED_MSG(__MAC_10_0, __MAC_10_5, __IPHONE_2_0, __IPHONE_2_0, "Use posix_spawn APIs instead.") __WATCHOS_PROHIBITED __TVOS_PROHIBITED;
		         ^
		1 warning generated.
		CC iodine.c
		CC client.c
		CC util.c
		LD ../bin/iodine
		CC iodined.c
		CC user.c
		CC fw_query.c
		LD ../bin/iodined
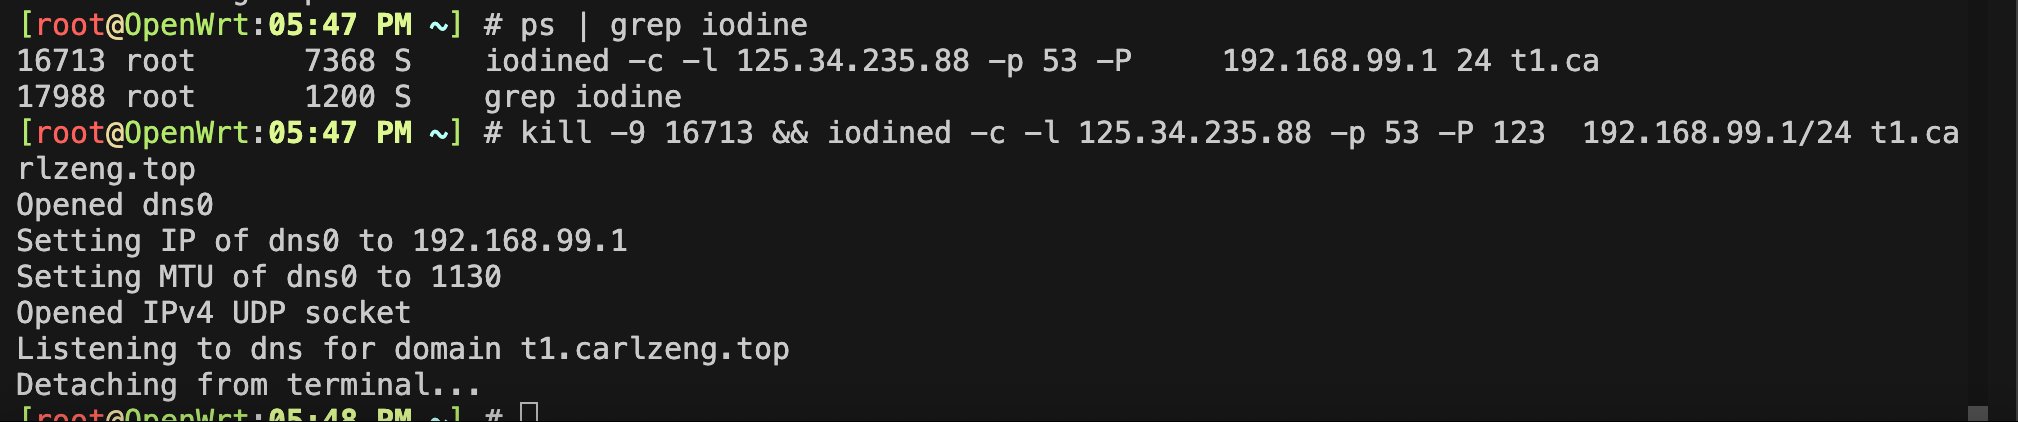
# iodined -c -l 125.34.235.88 -p 53 -P 123 192.168.99.1/24 t1.carlzeng.top Opened dns0 Setting IP of dns0 to 192.168.99.1 Setting MTU of dns0 to 1130 Opened IPv4 UDP socket Listening to dns for domain t1.carlzeng.top Detaching from terminal...
> ./iodine -f -P 123 t1.carlzeng.top No tun devices found, trying utun iodine: open_utun: connect: Resource busy iodine: open_utun: connect: Resource busy iodine: open_utun: connect: Resource busy iodine: open_utun: connect: Resource busy iodine: open_utun: connect: Resource busy iodine: open_utun: connect: Resource busy Opened utun6 Opened IPv4 UDP socket Sending DNS queries for t1.carlzeng.top to 223.5.5.5 Autodetecting DNS query type (use -T to override). Using DNS type NULL queries Version ok, both using protocol v 0x00000502. You are user #0 Setting IP of utun6 to 10.0.0.2 Adding route 10.0.0.0/27 to 10.0.0.2 add net 10.0.0.0: gateway 10.0.0.2 Setting MTU of utun6 to 1130 Server tunnel IP is 10.0.0.1 Requesting server address to attempt raw UDP mode (skip with -r) Server is at 125.34.235.88, trying raw login: (skip with -r) ....failed Using EDNS0 extension DNS queries get changed to lowercase, keeping upstream codec Base32 No alternative downstream codec available, using default (Raw) Switching to lazy mode for low-latency Server switched to lazy mode Autoprobing max downstream fragment size... (skip with -m fragsize) ...768 not ok.. ...384 not ok.. 192 ok.. ...288 not ok.. ...240 not ok.. 216 ok.. 228 ok.. ...234 not ok.. ...231 not ok.. 230 ok.. will use 230-2=228 Setting downstream fragment size to max 228... Connection setup complete, transmitting data.
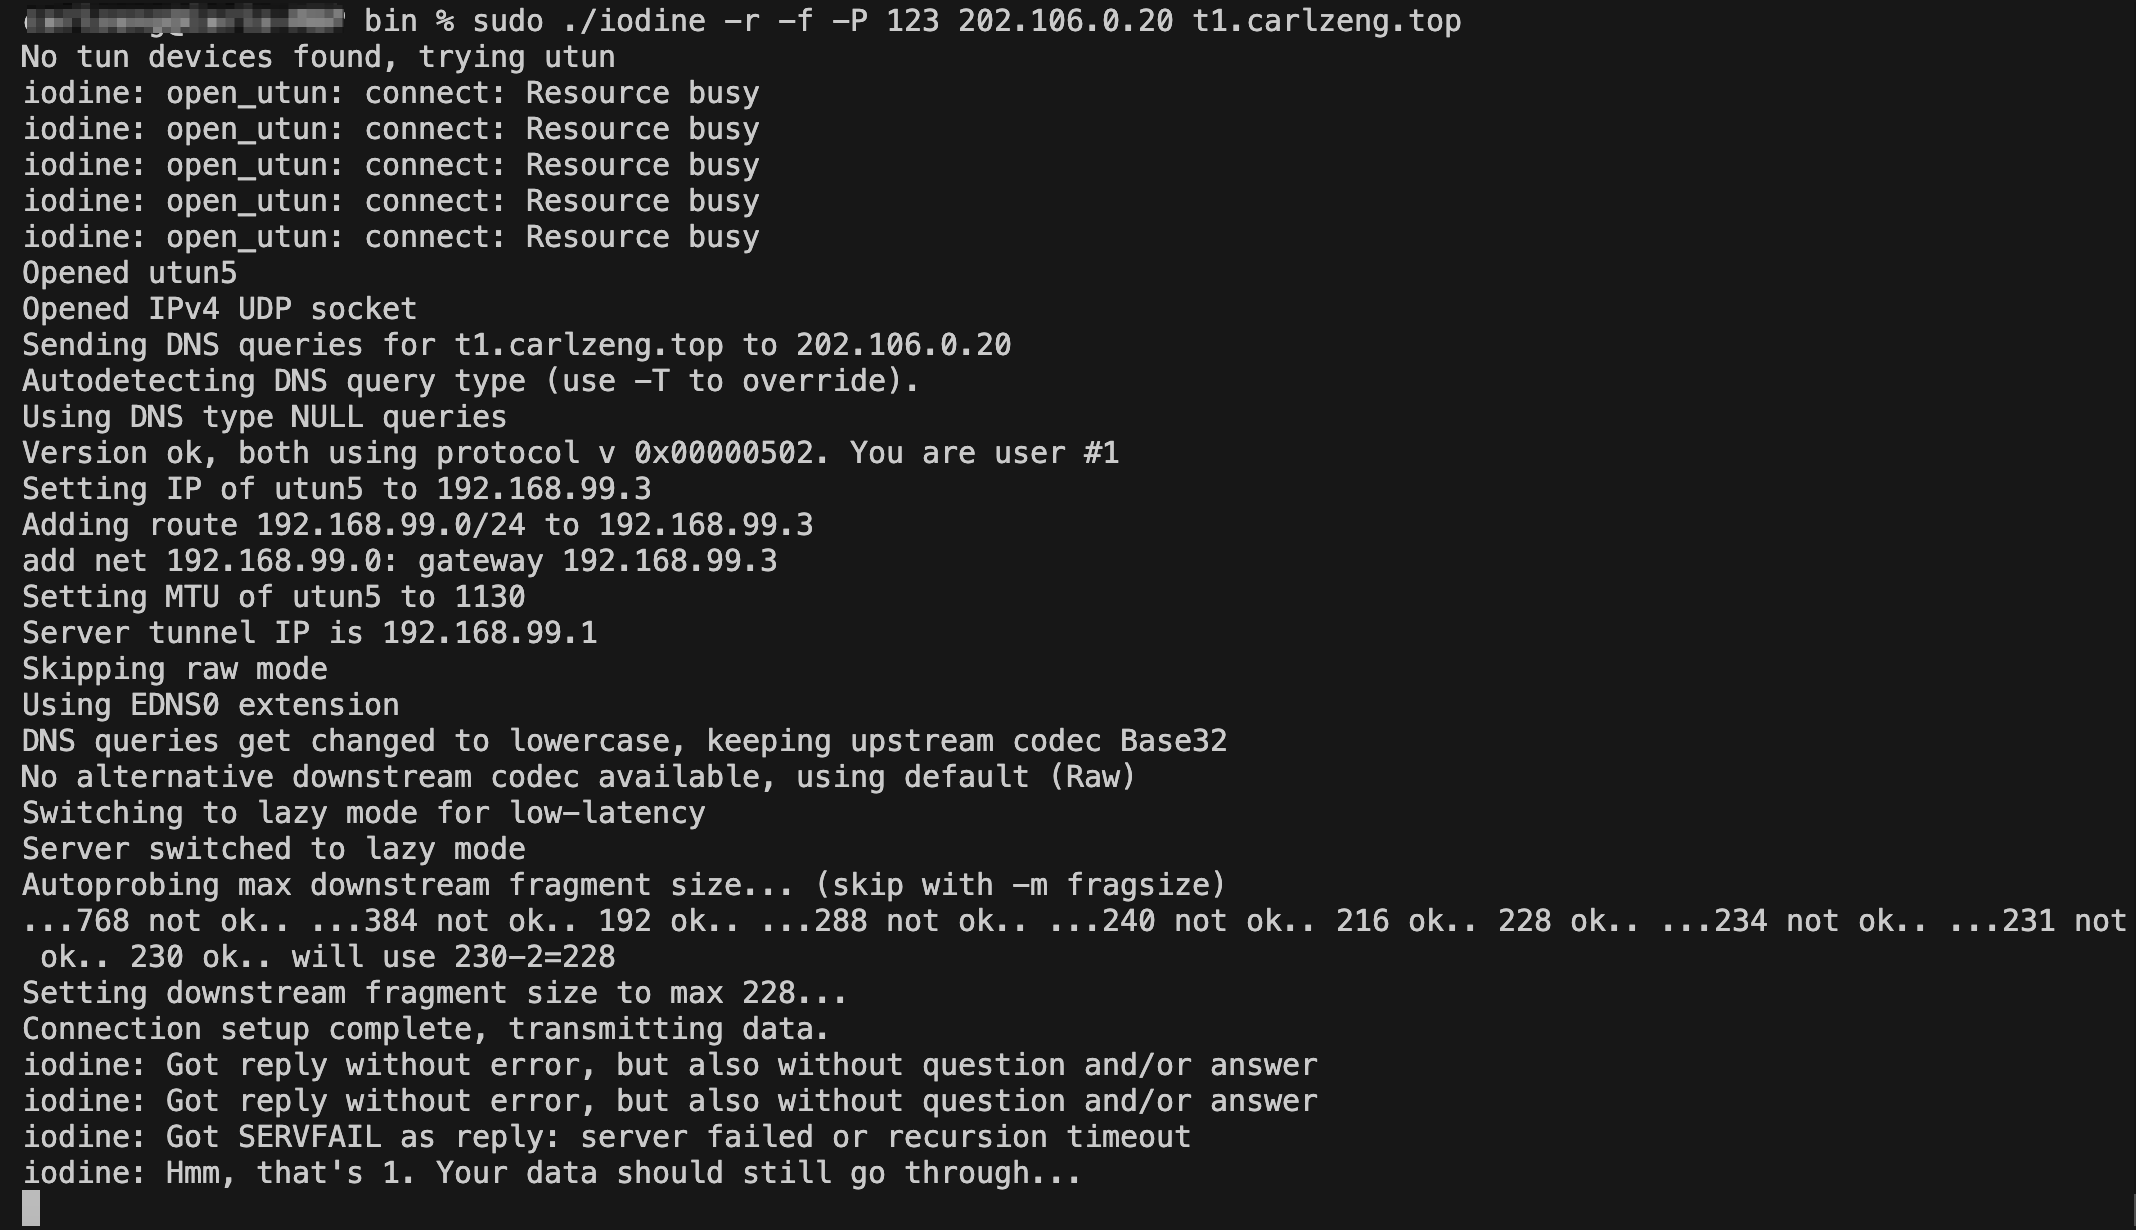
# sudo ./iodine -r -f -P 123 202.106.0.20 t1.carlzeng.top No tun devices found, trying utun iodine: open_utun: connect: Resource busy iodine: open_utun: connect: Resource busy iodine: open_utun: connect: Resource busy iodine: open_utun: connect: Resource busy iodine: open_utun: connect: Resource busy iodine: open_utun: connect: Resource busy Opened utun6 Opened IPv4 UDP socket Sending DNS queries for t1.carlzeng.top to 202.106.0.20 Autodetecting DNS query type (use -T to override). Using DNS type NULL queries Version ok, both using protocol v 0x00000502. You are user #6 Setting IP of utun6 to 192.168.99.8 Adding route 192.168.99.0/24 to 192.168.99.8 add net 192.168.99.0: gateway 192.168.99.8 Setting MTU of utun6 to 1130 Server tunnel IP is 192.168.99.1 Skipping raw mode Using EDNS0 extension Switching upstream to codec Base128 Server switched upstream to codec Base128 No alternative downstream codec available, using default (Raw) Switching to lazy mode for low-latency Server switched to lazy mode Autoprobing max downstream fragment size... (skip with -m fragsize) ...768 not ok.. ...384 not ok.. 192 ok.. ...288 not ok.. ...240 not ok.. 216 ok.. 228 ok.. ...234 not ok.. ...231 not ok.. 230 ok.. will use 230-2=228 Setting downstream fragment size to max 228... Connection setup complete, transmitting data.
# sudo ./iodine -r -P 123 202.106.0.20 t1.carlzeng.top No tun devices found, trying utun iodine: open_utun: connect: Resource busy iodine: open_utun: connect: Resource busy iodine: open_utun: connect: Resource busy iodine: open_utun: connect: Resource busy iodine: open_utun: connect: Resource busy iodine: open_utun: connect: Resource busy Opened utun6 Opened IPv4 UDP socket Sending DNS queries for t1.carlzeng.top to 202.106.0.20 Autodetecting DNS query type (use -T to override). Using DNS type NULL queries Version ok, both using protocol v 0x00000502. You are user #1 Setting IP of utun6 to 192.168.99.3 Adding route 192.168.99.0/24 to 192.168.99.3 add net 192.168.99.0: gateway 192.168.99.3 Setting MTU of utun6 to 1130 Server tunnel IP is 192.168.99.1 Skipping raw mode Using EDNS0 extension DNS queries get changed to lowercase, keeping upstream codec Base32 No alternative downstream codec available, using default (Raw) Switching to lazy mode for low-latency Server switched to lazy mode Autoprobing max downstream fragment size... (skip with -m fragsize) ...768 not ok.. ...384 not ok.. 192 ok.. ...288 not ok.. ...240 not ok.. 216 ok.. 228 ok.. ...234 not ok.. ...231 not ok.. 230 ok.. will use 230-2=228 Setting downstream fragment size to max 228... Connection setup complete, transmitting data. Detaching from terminal...
> ./iodine -f -P 123 t1.carlzeng.top No tun devices found, trying utun iodine: open_utun: connect: Resource busy iodine: open_utun: connect: Resource busy iodine: open_utun: connect: Resource busy iodine: open_utun: connect: Resource busy iodine: open_utun: connect: Resource busy Opened utun5 Opened IPv4 UDP socket Sending DNS queries for t1.carlzeng.top to 192.168.6.1 Autodetecting DNS query type (use -T to override)..iodine: Got NOTIMP as reply: server does not support our request .......iodine: Got NOTIMP as reply: server does not support our request .......iodine: Got NOTIMP as reply: server does not support our request ..... iodine: No suitable DNS query type found. Are you connected to a network? iodine: If you expect very long roundtrip delays, use -T explicitly. iodine: (Also, connecting to an "ancient" version of iodined won't work.)
------------------------------------------------------------------------ > sudo ./iodine -f -P 123 202.106.0.20 t1.carlzeng.top No tun devices found, trying utun iodine: open_utun: connect: Resource busy iodine: open_utun: connect: Resource busy iodine: open_utun: connect: Resource busy iodine: open_utun: connect: Resource busy iodine: open_utun: connect: Resource busy iodine: open_utun: connect: Resource busy Opened utun6 Opened IPv4 UDP socket Sending DNS queries for t1.carlzeng.top to 202.106.0.20 Autodetecting DNS query type (use -T to override)..................... iodine: No suitable DNS query type found. Are you connected to a network? iodine: If you expect very long roundtrip delays, use -T explicitly. iodine: (Also, connecting to an "ancient" version of iodined won't work.)
Analyzing DNS setup for tunnel domain 't1.carlzeng.top'... (might take some time)
Looking for nameserver for carlzeng.top.. got paityn.ns.cloudflare.com (at 108.162.194.18). Resolving delegation of t1.carlzeng.top at 108.162.194.18... to t1ns.carlzeng.top (at 125.34.235.88).
Expecting iodined to be accessible at 125.34.235.88... no reply.
Error: Make sure iodined is running and the firewall accepts UDP port 53. Also check any port forwards in use.
iodine: Got reply without error, but also without question and/or answer
1 2 3 4
#客户端重启提示错误:
iodine: Got NOTIMP as reply: server does not support our request
.....
iodine: No suitable DNS query type found. Are you connected to a network?
Analyzing DNS setup for tunnel domain ‘t1.carlzeng.top’… (might take some time)
Looking for nameserver for carlzeng.top.. got amir.ns.cloudflare.com (at 108.162.193.62). Resolving delegation of t1.carlzeng.top at 108.162.193.62… to t1ns.carlzeng.top (at 125.34.235.**).
Expecting iodined to be accessible at 125.34.235.**… yes, using proto 00000502. Testing iodine reply using default nameserver… ok.